Bakery, Barbells and Bargains I own a bakery, and I like to lift weights and shop

November 7, 2017

A 2017 Guide to Birthday Parties

Filed under: Just for Fun,Mommy Life — shuss @ 4:51 pm

Your daughter’s birthday is in 6 months and she will be anywhere between 1 – 18 years old, this is a huge deal people!  Start asking them what kind of party she would like to have.  Silently cringe inside as she suggest tacky themes and gently work to change their mind to the classy ballerina theme you saw on Pinterest.  Start a Pinterest board to organize your ideas  Next, pick a party date that accommodates the schedules of all grandparents, aunts, uncles and your childless friends from college.  You do not want anyone to miss this event. Go to a photo site and design a custom photo invitation.  Agonize over which photos to pick and wording.  You want this to look good but you do not want to look like you are trying too hard, spend $35 on invites.  This reminds you, you need to research photographers and book a yearly photo shoot.  If your child is turning one, it is an absolute requirement that you book a cake smash session…..oh, better find a baker…..

Research cakes on Pinterest and send your favorite photos to bakers to get prices.  Your favorite cake photo is a four tier cake made from four different flavors of cake and filled with organic white chocolate gnache with real vanilla beans and the tears of teddy bears.  The tiers are completely coated in gold and pink edible glitter and the bottom tier needs to be wearing an edible tutu made from spun sugar.  The top tier has a sparkly edible tiara and a monogram on the side.  You need for this cake to feed 16 people. Have a slight heart attack when the bakery sends you a quote of $5,000.   Reduce the cake to 2 layers and add 2 dozen half gluten free, half vegan cupcakes to the order.  Spend $800

Order child a custom tutu and shirt, this is important.  The shirt will need to have an applique to match the party theme, their age and a monogram.  Do not forget to order a hair bow like McKinsLee-Kate’s mom did last week, that poor child’s hair was a mess for her entire party.

In the months leading up to the party, scroll through your 10,000 birthday pins on your Pinterest “party decorations” board and pick your favorites.  Spend the next weeks going to craft stores and making rustic-chic ballet decorations.  You will need a photo booth background with props, tulle for tutu table cloths, a gold cake stand, glass cookie jars, gold table sparkles, glass drink dispensers, supplies for a custom pin the tail on the donkey game, and lots of pink tissue paper for paper flowers.  Head over to Target for paper goods and candles; stay in the store for 3 hours.  While there pick up yourself a sassy t-shirt, yoga pants, a t-shirt dress, eyeliner, shampoo, laundry detergent, photo frames, new toothbrushes and a new rug.  Swipe your RedCard quickly and don’t look at the total, grab a coconut milk cold brew from Starbucks on the way out.  Drive back 30 mins later to get forgotten candles.

The week of the party head to Whole Foods and pick food to accommodate all guests’ favorites and dietary restrictions.  Present the food as themed as possible.  Read labels to make sure the meatballs are sourced from local grass-fed beef and only get organic cheese cubes. After gum was found stuck to your couch last year, decide against the candy buffet this year.  Instead, you will offer a cookie buffet complete with ballet shoe shaped cookies, email bakery to add cookies to your cake order.  On the way out of the store, pick up a yogurt protein smoothie to drink on the way home and some riced cauliflower for dinner.  Spend $190 at the grocery store and add $250 to your cake bill for custom cookies.

Day Before the Party.  Clean your house from top to bottom and make sure everyone will be able to notice the new ship lap and farmhouse decor in your living room.  Hang decorations and set up perfectly decorated tables for gifts, food and drinks.  Try to decide if you want to put a pink table cloth over your new rustic farmhouse table or leave it exposed to be admired by the other moms.  Fill white paper treat bags with sensible small wooden toys made by Amish grandmothers, seal bags with custom monogrammed stickers.  Arrange food platters to perfection and store in the fridge.

The day of the party, set-up cookie buffet with a dispenser of organic milk and pink to-go boxes.  You do not need these kids eating all that sugar in your house, they can take those cookies home.   Set out food with cute labels and line the driveway and sidewalk with balloons.  Place the photo booth in the foyer so guest can take photos as they come in.  Take photos of all your work and post to Instagram.

Children will arrive along with their parents who will stay.  You are so not comfortable watching all these kids yourself, especially after Ainsley-Jude had an allergic reaction to rice cakes at a party last year.  The parents want to stay anyways, you can never be too careful with who you drop your children off with, EVER.  Take tons of photos and selfies with your fellow mom friends to post to Instagram later.  Turn on some kid friendly tunes that adults can tolerate and announce the party is starting.

It is time to eat, kids want everything on their plate except the veggies and take about three bites total. Half the parents partake in the finger foods while the other half sip on the vegan organic paleo protein shakes they brought from home.  Finally, the kids retreat to watch the birthday girl open presents then head back to the kitchen for birthday cake.  Exactly one child will eat all of their cake and the rest will just eat the frosting before returning to play.  Two adults will have a slice of cake and the rest will ask for just a “tiny slice.”  While kids play, chat with other moms about Zumba and how much you all adore Joanna Gaines.  Once everyone leaves, you have 2 large tiers of cake leftover and enough food to feed the Duggars.  Clean the kitchen with organic cleaner for granite and start thinking of new ideas for next year’s party.

Realize you forgot to hand out the treat bags.


November 6, 2017

Life of a Baker

Filed under: Pure Butter — shuss @ 11:43 am

As many know, I own a side business called Pure Butter Bakery.  I started by making cakes for friends and family, then I officially opened a business in the summer of 2015.  Doing this part-time, it was slow to start but as this business has grown, I have become completely overwhelmed by all the support I have received.  Since I do work full-time and that job does come first, I try to keep my cake orders to no more than two per week and I will usually take an extended vacation the first few months of the year.  My busiest seasons are spring and summer, so that makes it easier to take the winter months off.  It truly means so much to me when people ask me to make cakes for their weddings, birthdays, and other special occasions.  This post doesn’t have much to it as words go, I just wanted to give a little information about Pure Butter and share some of my cake photos.  This is by far not all of my work, but a pretty good idea of what I do.   Thank you to everyone that has allowed me to bake for you on your special days!  Enjoy!


November 3, 2017

A Big Room for a Little Girl

Filed under: Decorating,The House — shuss @ 10:35 am

Samantha’s new bedroom is one of my favorite new rooms in the house. It is a bit on the large size for a bedroom but I really do love how it turned out. Our little girl has liked Paris ever since she was about four years old, so we went with a subtle Paris theme.

We got some great deals on a lot of the furniture and finishes in this room. The headboard was an old one from Daniel’s parents that we painted white and added an S. I painted this using Valspar furniture paint in white with a foam roller.  The bed foundation is from Amazon and does not require a box spring.

The bedding was purchased at Target as they were phasing out the Circo line so I was able to get a great deal on the bedding set which included the comforter, sheet set, and two shams.  I also purchased the extra coordinating sheet set that is covered in hot hair balloons.  The toy box at the end of the bed is from Wal-Mart, I added the letters from Micheal’s using wood glue.  The toy box is absolutely full of stuffed animals, and of course the favorite ones have an honored spot right on the bed.

In the honored spot on the bed we have a Pingy the penguin, Baby Bailey, Floppy Bunny, an adorable unnamed unicorn and of course Bitty Baby, who has her own special pillow.  At the foot of the bed we have Poley, Pushie, Duffy and Violet.  We are a big fan of Violet in this house.  She is this adorable puppy that sings songs, including a bedtime mode that we use nightly and she comes with five books which she will read.  She was a great investment.

I think the Paris pattern on the bed is adorable and I really like the embroidered edge on the pillows.  Samantha picked her bedroom colors from the comforter and I think it has all come together so nicely with the white furniture and dark floors.

The night stand by the bed is from Amazon and I got it for under $40.  It is simple, has clean lines and has just enough space for some night time necessitates and a few treasures.

The gray toy bucket next to the bed is from Target and is nice and big so it can hold lots of stuffed animals.  These great buckets are under $15 and hold a lot of kid loot.  They also have some fancier storage options for kids but this simple gray bucket won due to size, it helps that it matches the walls.  I thought about building one of those cute stuffed animal zoos, but throwing them all in a bucket just sounds so much better after months and months and months of DIY projects.  At this point, if I do not have to touch a hammer or a paint brush, I won’t.

The dresser was another Target score as they were phasing out Circo so I got this piece for under $100.  We bought this well over a year ago knowing the addition was coming up and just stashed it in the basement.  It came with plain white knobs so I traded out with these cute pink flower knobs from Lowes.  It is a small dresser meant for children but holds her pajamas, shorts, jeans and lots of shirts with room to spare.

The top has just enough space for some sweet keepsakes.  My favorite is the porcelain doll, or “fancy doll” as Samantha calls her.  My favorite thing about this dresser is the super smooth finish that is very easy to clean and nothing leaves marks on it, perfect for a child’s bedroom.

Next to the dresser is the bookcase and a small Paris trunk.  Sammie keeps her books, art supplies and a few toys on the bookcase and her magazines in the trunk.  The giraffe on top is one she painted herself from Target’s craft section.  The ballerina, tea set and rag doll were mine as a child, my mother made the little pink rag doll.  The bookcase is from Amazon and the baskets are from Target.  Between the two I have framed one of her many masterpieces, a group of princesses.  The matted frame is from Micheal’s.


On the other side of the room, we have a vanity.  This sweet little vanity was from an online sale at Target, I do not remember the exact price but it was less than what I was finding similar ones for on Craigslist.  Next to it, we have a bow holder made from a $4 photo frame from Walmart and some ribbons.  On the other side of her vanity, is a jewelry holder that I found in the Dollar Spot at Target.  Her vanity is topped with a vase for hair accessories, jewelry box, Paris box full of lip gloss, and a tiara of course.  An area fit for a princess!


We turned the old bedroom into a playroom, but Sammie wanted to bring some special toys to her bedroom, babies specifically.  Their little nursery and essentials fit perfectly in this area.  Next to the babies, is the teepee which holds even more stuffed friends, we really like the star lights in the top.  The teepee was a Christmas gift and can be found at Target.  The Bitty Baby crib and changing table are retired American Girl but they do have newer versions available.  The baby doctor, baby monitor and pink case are from American Girl.

I call this the “closet area” as it is sort of a nook area containing a white wardrobe, storage drawers and accessory hooks.  The wardrobe is rather narrow but I thought we should really scale down on how many clothes she has.  She always has so many clothing choices for a growing child and now that she has favorite items, many are worn multiple times.  Plus, I just really like the look of a wardrobe.  Dresses and most in season shirts go in the wardrobe along with shoes.  The storage drawers hold underwear, socks and leggings.  Then her dresser contains pajamas, additional shirts, shorts and non legging pants.  Off season clothes that require hanging are out of the way in the playroom closet and all of our coats are stored in the guest room closet.  The side hooks are perfect for hanging little purses and the back hook holds an accessory organizer.  The basket on top of the storage drawers is currently empty but I think it will house mittens and gloves.  The large basket on top of the wardrobe holds extra sheets.  The decorative hooks on the front doors are perfect for hanging the next day’s outfit.  It is currently holding a dress for her special birthday lunch at American Girl tomorrow.   The other side of the wardrobe has a decorative hook to display her infant baptism gown made by my mother.  I would like to find a spot in her room to display her tiniest infant dresses.  In the future, I would like to change out the plastic storage drawers with wood ones in the same size to match the wardrobe, I really prefer for plastic drawers to be inside of closets, not out in the open,  However, I have not yet found a set of wood drawers to fit, so until then plastic it is!  The wardrobe is from Amazon, drawers from Big Lots, accessory organizer is from Target and the baskets I have had on hand for years.


And to conclude our room tour, we have the dormer.  The dormer is actually the reason her room is so large, I wanted to be sure to include the dormer into her space.  In the spacious little nook we have a large giraffe, a great bear you can sit on, a cozy FAO bear that was mine and a bean bag chair.  Every night at bedtime, Sammie pulls the bean bag over near her bed for us to sit on as she goes to sleep.  The dormer is decorated with a canvas of Queen Elsa and a Paris banner.  Right now we still have temporary blinds in this window as I need to order custom blinds for this entire floor.  I am still debating on curtains. The animals were gifts and the bean bag chair was another sale find at Target.  The Paris banner came with the Paris trunk and was part of a door prize she won at a tea party fundraiser.  The Elsa canvas is from Target.


So how did we create this fabulous room without over spending?  To start, we began purchasing large items in advance as we found them on clearance and stored them in our basement.  We took advantage of a few freebie or very inexpensive pieces of furniture that could be repainted to use in several areas in the addition, specifically her headboard.  For any furniture that needed to be purchased, I took my time comparison shopping and looking at DIY blogs for ideas on things I could create myself.  I also did a lot of shopping inside my own house and found things to re-home into this room, such as the teepee that was formerly in the playroom.  Most of the costs were wrapped into the whole addition costs and the only big cost for this room specifically was the furniture.

November 2, 2017

The House that Grew

Filed under: The House — shuss @ 9:43 am

In 2006 we decided to buy our first house but we did not immediately see anything we liked in our area. Luckily for us, my uncle owns Select Modular Homes so we made a day trip down to Asheboro, NC to check out the beautiful model homes. We selected a Cape Cod style home with around 1400 square feet and an unfinished upstairs with the staircase in place. Since we live in the mountains, our sloped lot would give us a crawl space of six feet, so we decided to add a basement. In April 2007, we happily moved into our new 3 bed/2 bath home knowing it was a house that could grow with us in years to come.

For the first few years, we worked mostly on trying to get our grass to grow, figuring out what plants would look nice and finding nice things to fill our home.  Two years in, we built a retaining wall to make the driveway look neater and to make the front yard more level. The wall was our first big project, we hired this one out.

When I was pregnant in 2010 with Samantha, we decided a little more space might be nice. Our house has a nice big master suite and the other two bedrooms are small, so we thought having a playroom would be beneficial. Daniel always wanted a home theater, so we made plans to finish off the basement. We started this project when I was about 8 months pregnant and finished just in time to host Sammie’s first birthday. This was a complete DIY project, with a lot of help from Daniel’s step-dad (Poppy) and brothers. The only thing we hired out was the carpet installation, which we got for a great deal from Lowe’s where we purchased the carpet.

Getting started with framing

We opted for a drop ceiling so we could easily access ducts, pluming and electrical work

Drop ceiling grid going in

Fresh new carpet in the playroom

Home theater ready to go


Almost three years later, we expanded the front porch. Again, this was a DIY with the help of Poppy project….isn’t Poppy just the best? This project took about three weeks, mostly working on the weekends.

Now did I mention two of our bedrooms are small? While we had an amazing huge playroom downstairs, we had some issues. The bedroom was starting to burst at the seams once we moved Sammie into a big girl bed. The other issue? Sammie would not go play in the playroom unless someone else was down there because she was so far away from everyone. We also had the guest room and office combined, which was not working anymore. We decided it was time to finish the top floor, something I had been excited about since we bought the house. This has been our most lengthy and most expensive project so far, and while also a big DIY, we also hired out the most help for this one.

Just after framing, practically a blank slate

Drywall delivery, they took out the window and brought it right into the opening, three floors up!

D checking out the first day of installation

Coming along! We had an amazing drywall contractor

So this project basically turned into a “lets just rearrange the entire house” fiasco. Here is what went down….Sammie’s bedroom moved upstairs and her playroom was downsized and moved to her current bedroom on the main floor, she is playing so much better with a playroom on the main floor.

Sammie enjoying ample space to stretch out

Daniel’s office was moved to a larger space upstairs.

This is about half his new office, still arranging

His current office is now a guest room. The guest room closet holds our coats along with many of my cake decorating supplies like frosting tips, fondant tools, boards and boxes that are not needed in the kitchen. I was also very happy to have a space on the guest room bookshelves to display my doll collection and some photographs.

The bookcases by the fireplace were moved upstairs to open up the living room more. This worked out great because I didn’t have to buy more shelves for upstairs.  I hung wedding photos on each side of the fireplace and added large baskets.

Bookcase and rocking horse in a new home

The large landing at the top of the staircase holds a small desk and a comfy chair perfect for reading.  The chair was formerly in Samantha’s bedroom and the desk was a used one I purchased from a friend and painted.

I love this desk and the antique phone

A cozy spot to read

I love my new Disney painting over the staircase

The former basement playroom will become a family room. Right now, we have a table for board games and some storage boxes full of Christmas decorations that need a new home.  Eventually, we want to move our couch down here and get a new one for the living room.  I am working now to create some storage space in the basement.

The theater, kitchen, dining room and master suite stayed just as they are. Although, my next plan is to get a new appliance suite for the kitchen…..

So our sweet little 1400 square foot home is now right around 3500 square feet without us having to break ground to add space. If you are currently looking at homes and your family is still growing, I highly recommend looking into modular homes with unfinished second floors or homes with unfinished basements that you can tackle later.

Other than these big projects, I have also done some small DIY updates here and there, which I plan to share along with more detailed posts on each room so please check back for updates!

October 31, 2017

Fitness, Food and Self Acceptance

Filed under: Life in General — shuss @ 3:28 pm

A little over a year ago, I walked into my local CrossFit box for my first Foundations class. Walking in the door was the hardest part, the short workout left me sore and I was hungrier than I had been in a long time.  The intense workout made me feel amazing, I was hooked.

Starting a scheduled workout program is one of the best things I have ever done for myself physically or mentally. I have struggled with food and accepting myself for years. I was a fairly normal sized but picky eater as a kid, and I can remember being worried I was too fat at just six years old. Looking back at photos, I was not a fat kid, maybe on the chunkier side now and then, but the 90’s were all about being lean.  As I hit my early teen years, I started to stretch out more in height and was a good average size.

In high school I dropped some weight fast without even trying and became about a size four for the first time ever. Compliments everywhere from everyone on how great I looked and I loved it, no one had ever complimented my weight before then.  I loved when people would comment on how “tiny” I was and how I had the “perfect figure.” Unfortunately, what people did not know was I hardly ever ate anything. I didn’t really stop eating intentionally to loose weight, but because I was just too busy during lunchtime in high school to take a break and actually have lunch.  I was also too shy to eat around boys, so silly but it is common with young girls.

This continued into college until about halfway through my second year.  I remained slim, didn’t eat enough and I was walking more now that I lived on a college campus.  About half way through college, I became interested in eating healthy and working out.  I kept a little book to log all my calories for the day and spent at least two hours a day at the gym.  I lived on campus and spaced out my classes to where I did the most walking possible around campus and I walked to my job on the far end of campus.  I steadily gained some weight through school but I was much healthier than I had ever been.  I graduated at a healthy weight.

I mostly stayed my “graduation weight” for several years, gaining  and losing some here and there.  About two years before my daughter was born, I got really paranoid about food and got so into healthy eating that it was obsessive and unhealthy.  I counted calories like crazy, not only calories but fat grams, trans fat grams, sugar, carbs, protein, sodium, ect.  Even on my “cheat days” there were foods I was actually terrified to eat.  Certain restaurants were off limits and I would look up the nutritional information before going out so I could log my calories ahead of time.  Before going to a party I would have a veggie smoothie to fill up so I wouldn’t eat too much party food.  Grocery trips took me extra time because I read all the ingredients of everything I purchased. I constantly searched for health information, often googling phrases like “most heart healthy foods” or “top foods to prevent cancer.”  I keep a list of “the world’s most healthy foods” in my calorie book and made sure I ate at least five items off that list per day.  If it were midnight and I had not worked out, I would still hop on the treadmill for at least an hour.  At work on my lunch break, I would do a workout video.  I saw my doctor and a nutritionist because I did not think I was losing weight fast enough.  My nutritionist told me I ate healthier than her and didn’t really have any advice for me….I failed to tell her how obsessed I was or she probably would have had more to say.

Finally, one day about two years ago I ran across an article written by a nutritionist about how there are no bad foods and you should never feel guilty for eating.  I wish I had a link to it because it helped me SO MUCH but I read it years ago.  Basically, it said to eat good 90% of the time and to just not worry about counting calories, listen to your body instead.  It also talked about how everyone is built different and not all people will be skinny, and that is okay.

I finally let go of my obsession.

I stopped counting calories.

I stopped lecturing myself when I ate cookies.

I listened to my body.

I didn’t lose weight but my relationship with food was improved.

Last summer, I had some hard times in my life come to a head.  I had some past hurts I just could not get passed.  My daddy had also passed away the previous December and I never really stopped to grieve his loss.  Basically, everything all hit me at once and I just did not feel good mentally or physically.  I had been using my treadmill when I could find the time to get to it but it just wasn’t working for me anymore, the walking alone for long periods of time was giving me too much time to overthink things.  So I made two key changes in my life.  Our family found a new church where I really reconnected with my faith.  I signed up to join CrossFit and gave my body a new challenge.  The new more intense workouts gave me a great endorphin boost and I did loose some weight……actually I lost around whopping 5 pounds but I dropped two sizes.  I feel a lot better and I am working to loose more (my weight is stubborn) but what I have gained is so beneficial.

Me with a barbell, drawn by my little girl

I gained confidence.

I gained strength.

I gained knowledge on how exercise works.

I gained more time with my hubby who had already been going.

I gained new friends.

The self acceptance at the CrossFit I attend is so refreshing.  Do our coaches push us to challenge ourselves?  Oh yes!  Do they encourage us to try hard and work towards our goals?  Yes!  Will they give nutrition advice?  Yep!  Will they give us advice if we are having a hard time meeting our goals?  You bet!  Will they celebrate when you reach a goal?  Oh goodness yes!

Do they tell us we need to be skinny?  Nope!  Do they shame you when you gain some weight or fail to loose it?  Nope!

My first day in class, our instructor told us he was not promising we would all have six-pack abs, because God made us all different.  That has really stuck with me and this is what I love the most about the gym and our coaches.  Some people that never work out are thin, some that work out all the time carry some extra fat.  God made you who you are and his design is perfect.  Focus on creating healthy habits and let the weight loss be a side effect.  So if you are struggling with weight. I encourage you to find a fitness program that you enjoy and a gym/trainer that will lift you up.  Talk to a nutritionist to make sure you are fueling yourself well.  Remember that your health is way more important that your size.  And finally, love who you are and remember you are worth love no matter your size.

October 27, 2017

California 2017

Filed under: Vacations — shuss @ 10:37 am

Last time, I shared the Disneyland portion of our trip and today I am going to share the national parks portion. Enjoy!

In this trip, we flew into Fresno and from there went to visit Yosemite and then the Giant Sequoias/King’s Canyon. This wasn’t my first trip to these parks but my first time actually staying inside of them. We spent two nights at each park before flying back to Los Angeles.

We first went to Yosemite and stayed at The Big Trees Lodge just inside the park entrance. The Big Trees Lodge is definitely memorable. It is a very pretty white hotel made of several buildings nestled perfectly in the woods. There is a golf course, huge porches and one large dining room for meals. I kinda felt like I was on the set of Dirty Dancing. It was also very historical, the rooms were small with antique furniture and fixtures. It had original 1920’s wiring (you could not use a hair dryer) and a claw foot tub…..that was interesting, for some reason I have a fear of claw foot tubs, shudder! Fortunately, we booked rooms with private bathrooms as many are shared and you have to go outside to get to them, yikes! The rooms had no WiFi or television. We actually kinda just stood in the room clueless when we got there, haha. It was all good, we were still jet lagged and all in bed by 8 pm those first two nights.

Outside the main lobby at the Big Trees Lodge

While in the park, it was about an hour drive to the main Yosemite area. While beautiful, the very high mountain roads gave me some serious anxiety so I am glad we only had to make the drive two times a day. What I really liked about Yosemite, was once you were in the valley everything was close by. We parked at one area where we all enjoyed playing on some rocks and fallen trees, Samantha really enjoyed climbing rocks!

Playing on the rocks

Driving from our hotel to the valley

Miss Sammie exploring


Next, we took a nice paved trail to see some waterfalls and then took the shuttle bus over to visit the Majestic Yosemite Hotel. This luxury lodge is right in the park and very beautiful, we were lucky enough to take a tour and check it out. We ended our full day in Yosemite with lunch at a pizza place, browsing the souvenir shop and just enjoying the scenery. My favorite things in Yosemite included the amazing views of Half Dome, the Majestic Hotel tour and the animals, deer and chipmunks were everywhere.

Sammie loved seeing deer so close


The next morning after breakfast at the lodge, we headed out for the Sequoias. While Yosemite was stunning, I think everyone in our group was ready for a hotel with more modern amenities.   When we arrived to the Sequoias, we stopped at a nice area near our hotel with nice trails among the giant trees and had lunch at a nearby restaurant.  After a nice long walk, we checked into the John Muir Lodge for the next few nights.  I was thrilled to see a hair dryer and normal bathroom, Sammie was thrilled to see a TV and we were all very happy to have WiFi.  We had a late lunch, so that evening we had a small dinner on the porch.

Enjoying the new lodge

Looking for baby chipmunks

Our full day in the Sequoias included driving to many different stops including the Sherman tree which is the biggest tree in the world and a hike up to the top of Moro Rock.  What a hike, 300 feet up!  I wore my CrossFit shirt that day and I am pretty sure I heard it laughing at me as I huffed and puffed my way up the steep and terrifying stairs.  The top view was beautiful and worth it.  Other sites included the Grant Tree which is known as America’s Christmas Tree, the Tunnel Log, the Auto Log and a lovely loop around a huge meadow where we saw lots of huge trees and a sweet family of deer grazing.   My favorite thing about Sequoia was just how incredible the trees were, how quiet it was and the cute deer.

The next morning, we headed back to Fresno so four of us could fly to LA for Disney.  What a wonderful few days of exploring all the natural beauty!

October 25, 2017

Disneyland!

Filed under: Vacations — shuss @ 10:15 am

Hello all! We just returned from our very first time at Disneyland California and I wanted to share some stories and tips from our trip.

To start, we are East Coast people, so we normally visit Walt Disney World which I have written about previously. When we planned a big family trip to visit the Sequoia’s (more on that later) we thought it would be fun to spend half of the week in the LA area and visit Disney. There are a lot of similarities and differences so I wanted to write and share both. Hope you enjoy and find this helpful if you are planning a trip.

What’s Similar?

Well, it is Disney so you will find a clean park, smiling faces, helpful cast members and lots of Disney magic at every turn. The prices for tickets, food and merchandise also seemed the same. Both resorts have a Downtown Disney District, on-site lodging and resort transportation.

If you have been to Disney World, you will find that the Magic Kingdom and Disneyland are very similar. Both have a charming Main Street that leads to a beautiful castle, then various lands branch out from there. The rides are also very similar but we were thrilled to find some rides in CA that are not in FL like Mr. Toad’s Wild Ride and the Matterhorn.

Both locations also had great parades and impressive night shows, I really enjoyed World of Color at California Adventure.

So what’s different?

The first big difference I noticed was the size. When approaching Disney World, there are multiple exits off the interstate depending on which park/hotel you are going to and a huge arch over the highway to welcome you.  The parks and hotels all have a large distance between them.  At Disneyland, you basically walk or drive down Harbor Blvd in Anaheim and you will see a sign that says Disneyland Resort, you just turn in and you’re there!  After walking past all the bus stops, you go through security and you are in this center area between the two parks and just turn left or right depending on where you want to go, easy!

The other big difference, on-site hotels!  I always recommend staying at a Disney hotel when in Disney World because there are so many options for different budgets, hotel parking is free and there are shuttles to the park.  Disneyland offers three beautiful hotels but they were on the expensive end so we opted to stay at what they call a Good Neighbor hotel.  Good Neighbor hotels are listed on Disney’s website and you book them on your own.  Our hotel was about two miles from the entrance, offered a shuttle, included breakfast and we had a nice roomy suite.  The cost was around the same as a moderate level resort at Disney World.

Dining was also a bit different in a few ways.  Disneyland seemed to have less table service places and less character meals.  We were able to book a princess lunch that was excellent but I think it was the only non-breakfast character meal.  Disneyland also does not have a meal plan.  I know you pay regardless, but that meal plan is just so dern convenient.  Somehow it stings less to use your snack credit to buy that Dole Whip rather than forking out the $14.  And this is not dining specific, but I did not see any Magic Bands at Disneyland.  I just loved those things at WDW….your room key, park ticket, meal plan and credit card all on your wrist.  No purse, no backpack, nothing in the pockets, PERFECT!

Since I like to write about budgeting, onto cost.  Cost is a scary thing at anything Disney but there are a few ways to save.  First all, you’re going to spend some money so just go ahead and accept that way before you go and save up.  Second, if you are a responsible credit card user, consider a Disney credit card.  We were able to use our points to cover almost all of our ticket prices, we all three got into the park for two days for just $85, that is less than a one day ticket for a child.  You can also use your points redemption card (a gift card) for purchases in the park such as food and merchandise.  It will take a while to earn a lot of points so plan ahead on this one.  Another way we saved was bringing our own bottled water and a few snacks into the park, Disney allows this and it will save you a little cash.  We also chose a hotel that included free breakfast.  Research and compare prices and you can get a hotel that includes breakfast for the same cost as one that does not.  We stayed at a Hilton hotel and since I am a Hilton Honors member (free program!) I got a lower price on the room and used some of my previously earned points to pay for the room.  To do this you will need to book directly through Hilton and not a third party site.  For even more savings, Hilton does own Hampton Inn which generally costs less per night and offers similar amenities.

The final thing I really liked about Disneyland ‘s smaller size was we really only needed two days to enjoy both parks.  This gave us the opportunity to spend the rest of our week exploring other areas of California.

So my favorite parts of Disney?  Guardians of the Galaxy Breakout (formerly Tower of Terror), Sleeping Beauty’s Castle, Matterhorn, Jungle Cruise, Pirates of the Caribbean and Peter Pan.

Overall, if you want to go to Disney, I would recommend going to the one closest to your home.  You will spend less money getting there and you will have a great time at either location.  However, if you are are visiting the Southern California area anyways and love Disney like me, it is totally worth the visit.  I have some pics from our trip below to share!


April 22, 2015

DIY Coffee Table

Filed under: DIY — shuss @ 12:21 pm

I love the smell of lumber, LOVE it!  I think it is because my dad used to do a lot of wood work when I was really little.  My grade school teachers would show me book racks and such he made for their classrooms.  I can remember being really little and my dad working in the basement of different projects and every time I smell cut lumber, I think of him,  I guess I have inherited this interest from my dad….although my execution of some of these projects would probably drive him nuts.

The largest piece of indoor furniture I have made to date is my new coffee table.  For the longest time I had a faux leather storage ottoman to hide toys in lieu of an actual table but after building the new fireplace mantels, I wanted something different and oh so slightly rustic to go with it.  I searched and searched online and found many beautiful tables but not anything I was looking for so I did what I always do….wing it.  So far that’s working for me….maybe…

I started off with a trip to Lowes.  Do they give an employee discount?  If so, I should REALLY consider a weekend job there.  Anyhow, I started with two pieces of a thin plywood type board that was 2×4 feet.  I believe it was in a section labeled “project boards.”  Then I gathered up some 1×6 inch boards for the top and had them cut into 4 four foot long pieces.  I also got some 1×2 inch boards and had them cut into 6 four foot pieces and 4 just under 2 foot pieces.  I couldn’t find any table legs I liked so I went with the thickest dowel rods and bought two.  I finished off my trip with four round furniture feet and a can of Cabot water based stain in Ebony.  I spent around $94.

This is the table finished,

coffee

This is how I put it together…. warning, my instructions are as clear as mud.  This is what happens when you make up things as you go.

I started off by gluing down my 4 foot long boards to the sheet of plywood, putting the 2 inch boards on each end.  The 2 inch boards overhand the plywood by about 1 inch.  I didn’t have enough clamps so I stacked weights and old yearbooks on it to hold it all down…classy.  Once dry, I flipped it over and built a little frame using the 2 four foot pieces and 2 two foot pieces.  This was glued to the underside of the table top and clamped until set.  Once set, I glued the four dowel rods which had all been cut down to 22 inches long to the table top, I nestled these snug against the frame corners.  After set, I took the second sheet of plywood and placed it on top of the table legs, lining it up with the table top.  Once set into place, I glued it to the four table legs and left to dry.  Once dry, I built another frame from the 1×2 inch boards for the bottom part of the table.  Once all the glue was dry, I flipped the table back over to the correct position and it stayed together, gorilla glue is no joke!  Then I nailed the contraption together everywhere I thought I should secure it.  I made sure the legs where nailed to both the bottom and top, and made sure the frames were also nailed in as well.  I just kept going until I felt confident that it wouldn’t fall apart on me.  Lastly, I flipped it back over and added the four table feet.  You cannot see them, put it lifts the bottom shelf off the ground just enough.  I also added a scrap furring strip across the bottom to reinforce the bottom shelf.  After all that was said and done, I gave the entire piece 2 coats of stain.

In my living room, the table looks like this…

coffee2

Perfect!  I was still able to have ample toy storage space by adding the crates on the bottom.  Those are just simple wood crates from Michael’s that I painted with a very light tan paint, and the end caps are painted with chalkboard paint so we can label the bins.  Toys are still hidden, and I think it looks better in the space than the ottoman did.  Plus, Sammie can easily remove a bin and play with those toys.  I’m liking this furniture building hobby. 🙂

November 20, 2014

A Savvy Mom’s Guide to Disney

Filed under: Vacations — shuss @ 4:32 pm

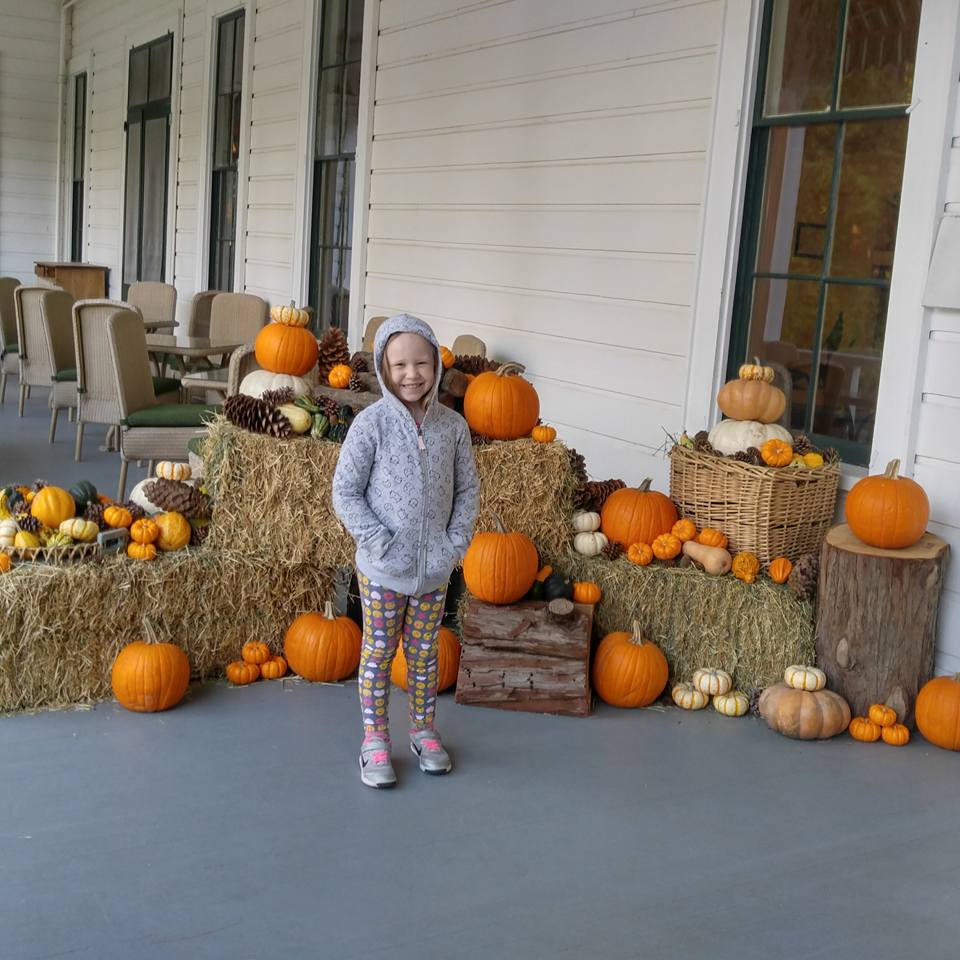
Two weeks ago my family took a magical vacation to Walt Disney World. My first time as an adult, Daniel’s first time since college, and Samantha’s first time ever!  We had a great time looking at the beautiful parks, going on rides, eating yummy food and meeting characters.  I’ll share some favorite memories and photos on a later post.

castle

Several people, especially with kids, have asked me for some Disney tips and since I am determined to post regularly, I decided to make a full post on it.  I am basing my advice today on what we did, I’ll add some suggestions for what might work better for others and also add what I would advise against.  This is a long posts because Disney is a big place with tons of options!  Please feel free to send me any questions!

-First off, book with a travel agent!  Your cost will be the same but they will help you out so much.  You may have a hotel selected, but they will show you some other options in your budget.  They will also let you know if any sales come up that you could take advantage of, even if you have already booked your trip.  They will also call in your payment to Disney.  It is much quicker to call your travel agent with your payment info than it is to wait on the phone for a Disney rep.  If you’re thinking of taking a vacation soon and want my travel agent’s contact info, please let me know.

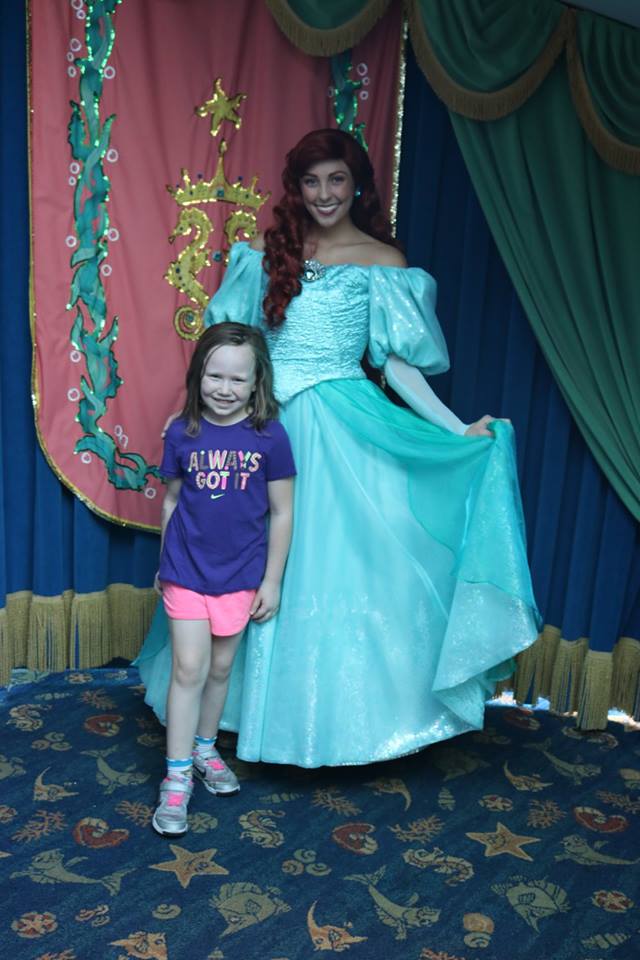
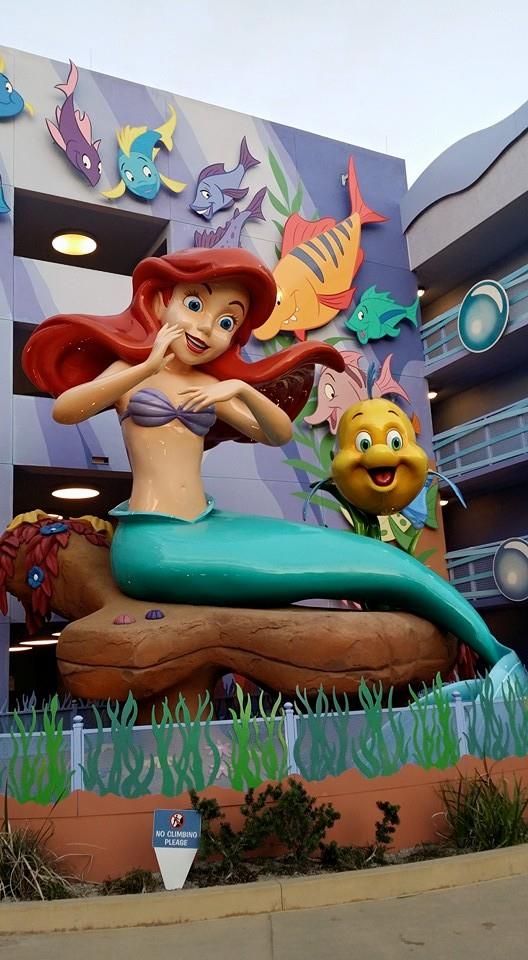
-Stay at a Disney resort on property.  I often read advice to stay off property because the price is cheaper, but I have to disagree.  At Disney there are levels of resorts ranging from value to deluxe villas.  Pick one in your budget, I got a value level room in November for $108 a night, I have stayed in chain hotels for more money at way less exciting places with zero themes.  All Disney resorts have transportation to all the parks and guests can take advantage of Magic Hours.  They all have great themed pools and fun decor.  We stayed at the new Art of Animation Resort and I think that one is perfect for children.  The themes are Nemo, Cars, Lion King and Little Mermaid.  We stayed in the Little Mermaid area and our room was perfectly animated!  Even if you can get an off-property room cheaper, to me the convenience is worth the price.  No daily driving to the parks, no parking fees and it is so easy to go back to your resort for a mid-day break.  With young children this is especially important to be able to take breaks with ease.hotel

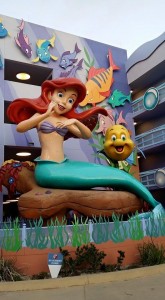
-Get a dining plan!  The food at Disney can be expensive and after adding up my receipts compared to what the dining plan cost, we saved money on food.  There are a few options to choose from and we went with the Plus Dining Plan which included one quick service meal, one table service meal and one snack per day.  Both the quick service and table service meals included your entree, drink and dessert.   Other options are a two quick services meals per day and one snack for a lower cost.  For a higher cost, you can select the Deluxe Plan with three meals per day (sit-down or table service, table service includes an appetizer) and two snacks.  There are further upgrades from here that include other options which can be viewed on Disney’s site.  There you can also look at the various restaurants along with the menus, location and what types of dining plans are accepted.  It was also tell you which restaurants are considered Signature Dining, meaning you may need to trade in two sit-down meals off your plan for one meal.  Gratuity is not included, except for Signature Dining.

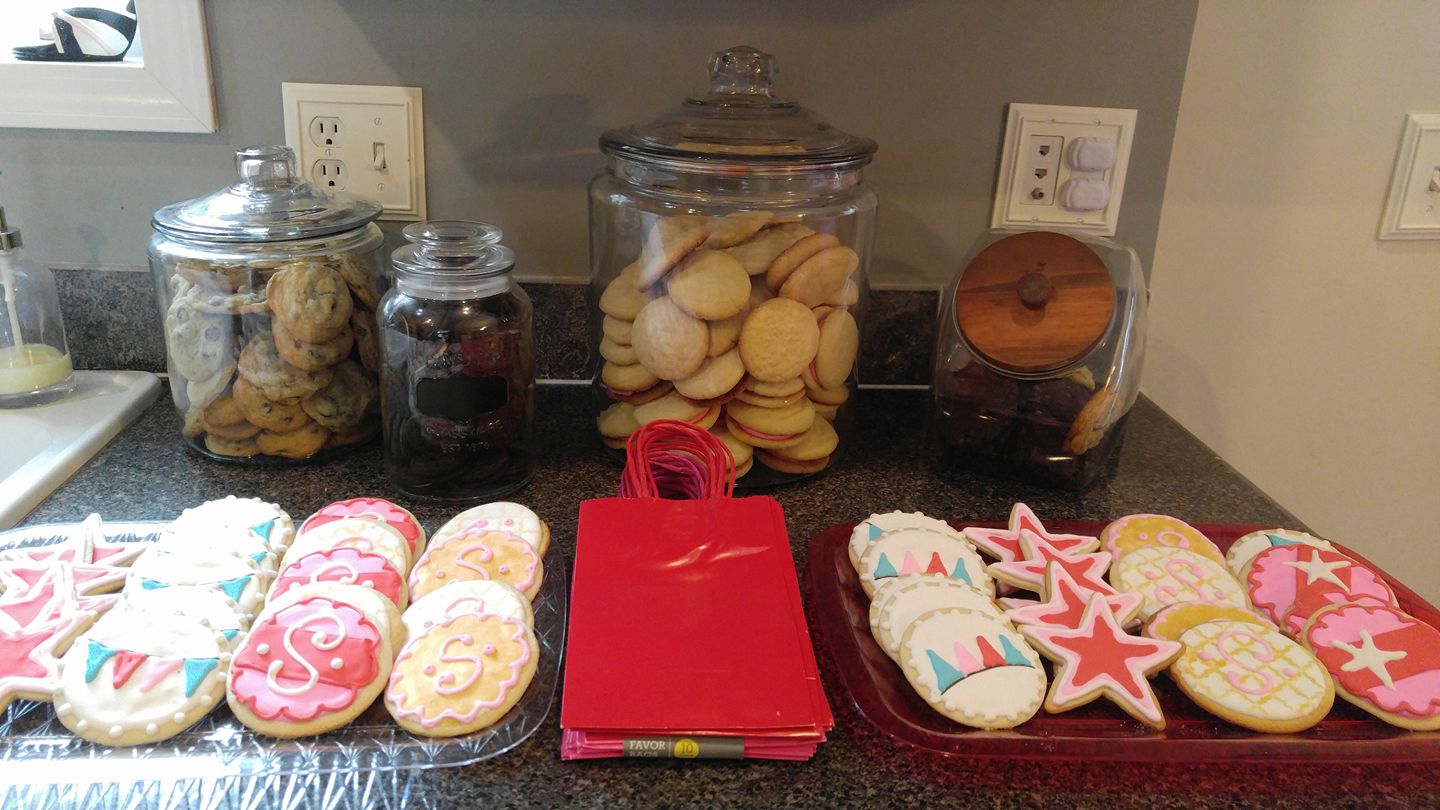
While the Deluxe Dining Plan looked very tempting and delicious, and I may try it in the future, I think the Plus Dining Plan is the best way to go to both save money and have a fun experience.  With that plan, you are only paying out one meal gratuity per day (which get expensive due to the high food costs, 18% is recommended) due to only eating at one table service place.  The portions and selection for both quick service and table service are generous, the drinks are big and the desserts are good too.  I often got cookies or brownies for dessert because they were individually packaged so I would have them as a snack for later.  And oh the snack credits, you can really maximize snack credits at Disney, more on that later  Below is a breakdown of where and what we ate daily with the Plus Dining Plan:

Day One – Magic Kingdom all day

Breakfast – in room, rooms have a fridge!

Lunch – The Friars Nook (quick service) – yummy mac&cheese meals, I had mac&cheese topped with pot roast.  For dessert we had apple slices and chocolate chip cookies.  Due to a mix-up Samanthas meal was free so we had an extra meal credit.

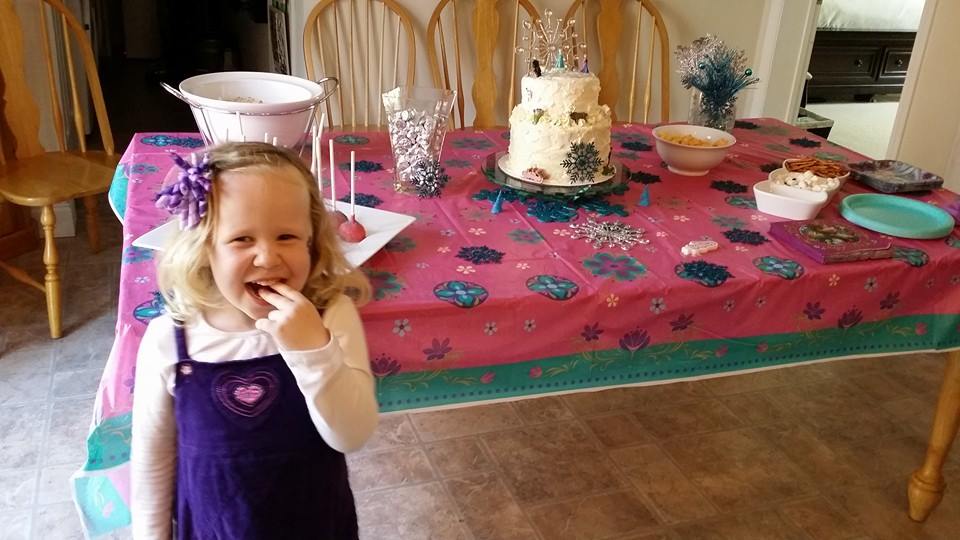
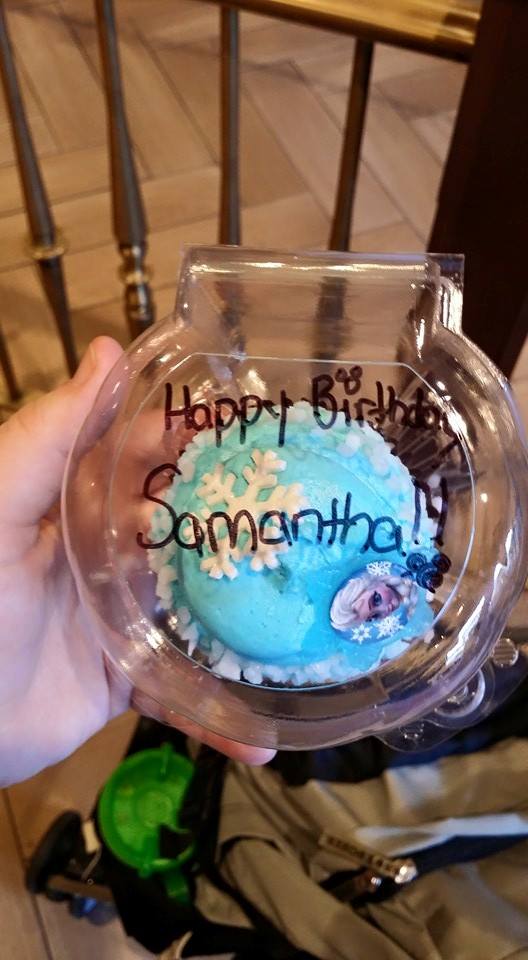
Snack – Main Street Bakery – Large Starbucks drinks for Daniel and I, a special Frozen cupcake for Samantha (they even added a birthday message!)

cupcake

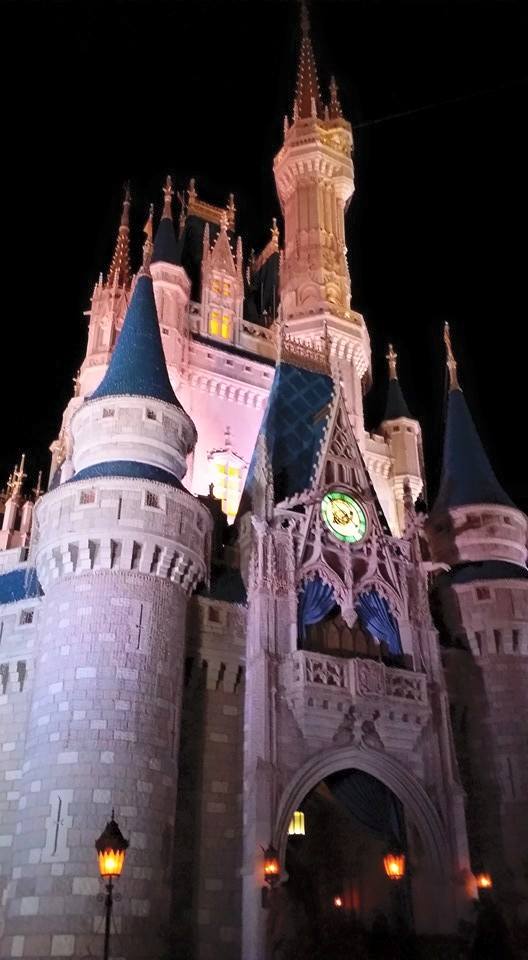
Dinner – Cinderella’s Royal Table (signature dining – 2 meal “points” each) – even though we had to trade in two meals each for this experience, I would do it again.  It included some extras that are not included with other table service meals in our dining plan such as gratuity, appetizers for all three of us and prints of Samantha with Cinderella and a print of the castle at night….all packaged up in a cute Cinderella folder.  The Disney Princesses all came to visit us at our table and posed for pictures.  We were seated by a window with a fabulous view of the fireworks, the girls were all given a magic wand and boys were given a sword (adults too) and each table received a Wishing Star keepsake.   For dinner I enjoyed a cheese tray appetizer, steak and shrimp with veggies and a yummy chocolate dessert made to look like a clock striking 12.  Samantha was given a big birthday cupcake with candles in addition to her dessert.  Absolutely wonderful evening!

Day Two – Epcot and Downtown Disney

Breakfast – in room

Lunch – The Coral Reef (table service) – Cool place with huge windows to see right inside an aquarium.  Yummy seafood, pasta and steak dishes.  I think I had a steak with veggies and cheesecake for dessert

Dinner – Wolfgang Puck Express (quick service) – Hands down the absolute best quick service we had all week, the menu had the most variety and after ordering at the counter, you were waited on.  Daniel and Samantha had pizzas, I had spaghetti with meatballs.  Brownies to-go for dessert.

Snack – We skipped snack, too full!

Day 3 – Hollywood Studios

Breakfast – in room

Lunch – ABC  Commissary (quick service) – Burgers and fries type place, I think we all had burgers.  I had chocolate mousse for dessert, Daniel had cheesecake and Samantha had cookies to-go.  Kid’s meal also came with grapes.

Dinner – Sci-Fi Drive In (table service) – We paid out-of-pocket for this meal, as it had the lowest price menu of all the reservations we had made.  We needed to pay for one meal out-of-pocket since we used two credits each on Day 1.  We had a simple meal without dessert.  The restaurant looks like your outside at a drive-in and the jumbo screen plays old movies.  The tables are cars from the 1950s.  Lots of shakes, burgers and salads on the menu.  I had a big salad with chopped apples and sunflower seeds.

Snack – The ice cream shop on Magic Kingdom’s Main Street.  Daniel and I had the ice cream sandwiches which were two enormous fresh baked cookies with dipped ice cream of choice in between, I could not finish mine.  Samantha had an adorable big scoop of ice cream on a cone with two little chocolate cookies for Mickey ears.  We enjoyed our snacks while watching the castle being transformed into an ice palace by Elsa, followed by the night parade.

Day 4 – Animal Kingdom

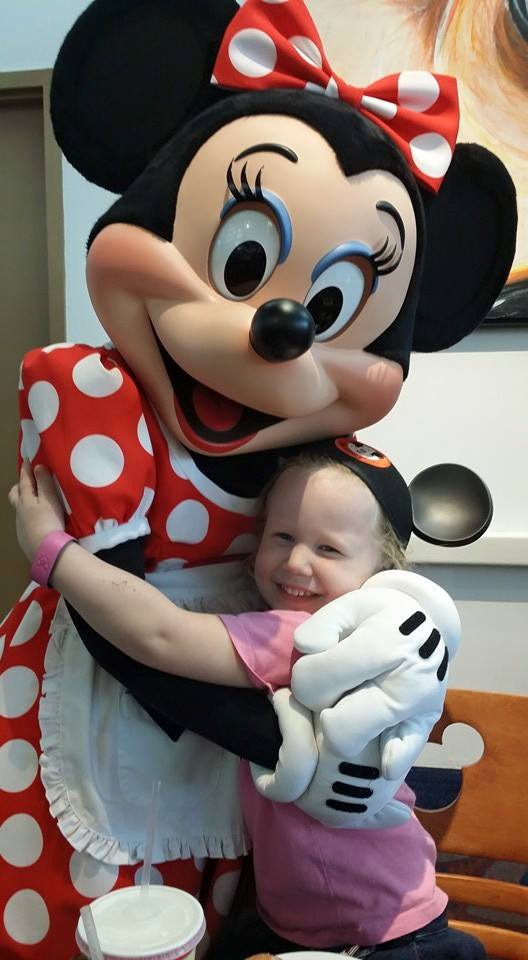
Breakfast – Chef Mickey’s at the Contemporary Resort. (table service)  Full buffet with characters.  Any breakfast food you can think of, all the Mickey Mouse characters visit your table to sign autographs and pose for photos.

minnie

Lunch – I do not remember the name, but it was a quick service pizza/pasta/salad place in Animal Kingdom

Snack – Samantha had a popsicle from a cart, Daniel and I later got custom dipped Mickey rice crispie treats from Goofy’s Candy Company in Downtown Disney.

Dinner – Since we used a meal credit for breakfast and we had returned to our resort for swimming early, we opted to eat off-site.  We had Chick-fil-a about 5 minutes away then went to Downtown Disney for the evening.  I normally do not suggest eating off-site but since we were finished in the parks for the day, it worked the best.

Day 5 – Magic Kingdom

Breakfast – Main Street Bakery (snack credit for Daniel and I, quick service credit for Sammie).  Since Samantha had an extra meal credit, and we all had an extra snack credit we had breakfast out.  Large frappuccinos for Daniel and I, a breakfast sandwich and milk for Samantha.

Snack – Popsicle for Samantha

Lunch – (quick service) Do not remember the name, but we had bbq sandwiches and cake at a place in Frontierland

Dinner – The Crystal Palace (table service) – full buffet with Pooh characters.  The selection was good, yummy food and excellent service.  You could see the castle from the porch while waiting to be seated.

Snack – Starbucks drinks at Epcot while watching the fireworks show

Whew, so that is what we did to give you an example of what you get for the dining plan.  Remember to maximize your dining plan by getting the good snacks, look at the bakeries and candy shops to get the best bang for your buck.  You can also take food into Disney, so take in your crackers, granola bars, apples, ect.  Because while you can use a snack credit to buy a banana, you can also take one in from the room and use that snack credit for a Starbucks drink or ice cream sundae big enough to share….I think those big turkey legs are considered snacks as well.  Our package also came with a refillable resort mug for each person that could be filled at our resort.  We filled those each morning and didn’t need to buy any extra drinks in the park.  They are nice insulated hot or cold cups with lids and Mickey characters, I still use mine.

-Next topic – If you have a smartphone, use it to your advantage.  You can download the Disney app and link it to your account to show you your entire itinerary for the day.  You can also search for places to eat, look at menus, gps attraction locations, find characters, check wait times and change fastpass selections.  We changed several fastpass options after comparing wait times to make the best of our time as possible.

-The Disney Credit Card – I know many try to avoid credit cards and I do not believe in carrying credit card debt, but I do believe in using a credit card like cash, paying it off in full monthly to avoid interest, and taking advantage of the rewards!  We had the Disney card for less than a year and the rewards were still very noticeable.  We paid for everything including the trip and gas to get to Florida on the card.  Onced at Disney, we just popped into Guest Relations and traded in our points for a giftcard, easy!  We used the card to pay gratuities all week, a sit-down meal for 3, a teddy bear, an autograph book, a Christmas ornament and a Christmas gift for Samantha.  In fact, for the entire time, we only paid cash for a pair of Mickey ears, an autograph pen and a dinner off-site.  I have also made purchases at the Disney Store with a discount when using my card.  I’m really excited to continue to use this card so I can rack up enough points to help pay for my next Disney vacation.  Just remember, it is a credit card, so spend responsibly and use it to purchase what you are spending money on anyways.

-Drive or Fly?  Daniel drives a Prius and we were visiting with his family near Disney for the weekend prior to our trip, so driving was the best choice for us.  We are also at a distance where we can make the drive in one day with being able to wake up and go to bed at normal times.  Also, when we left we had so much luggage, I was relieved we didn’t have to pay those luggage fees.  We also only have a regional airport near us that tends to be expensive, and has stops.  We would need to drive 3 hours to a big airport in Charlotte or Atlanta, wait around another few hours at the airport, then fly for about 1-2 hours….by the time that is all said and done, we could be there by car.  However, if I could ever score one of those last minute Asheville to Orlando cheap flights, I’ll take it!  So this component of your trip just depends on you and where you’re coming from.

-Pack for any weather if you go in the fall or winter.  Warm days, cold evenings and just warm enough to swim.  Be prepared and maybe schedule some time to run back to your room for warmer clothes before dinner.

So those are my tips based on my most recent trip, my first as an adult!  I would like to give a big thanks to my parents for taking me to Disney so many times, it is a fun vacation, but its a lot of work too!  Next year we may have to take a relaxing Disney cruise.

flying


« Newer Posts

Powered by WordPress