I love the smell of lumber, LOVE it! I think it is because my dad used to do a lot of wood work when I was really little. My grade school teachers would show me book racks and such he made for their classrooms. I can remember being really little and my dad working in the basement of different projects and every time I smell cut lumber, I think of him, I guess I have inherited this interest from my dad….although my execution of some of these projects would probably drive him nuts.
The largest piece of indoor furniture I have made to date is my new coffee table. For the longest time I had a faux leather storage ottoman to hide toys in lieu of an actual table but after building the new fireplace mantels, I wanted something different and oh so slightly rustic to go with it. I searched and searched online and found many beautiful tables but not anything I was looking for so I did what I always do….wing it. So far that’s working for me….maybe…
I started off with a trip to Lowes. Do they give an employee discount? If so, I should REALLY consider a weekend job there. Anyhow, I started with two pieces of a thin plywood type board that was 2×4 feet. I believe it was in a section labeled “project boards.” Then I gathered up some 1×6 inch boards for the top and had them cut into 4 four foot long pieces. I also got some 1×2 inch boards and had them cut into 6 four foot pieces and 4 just under 2 foot pieces. I couldn’t find any table legs I liked so I went with the thickest dowel rods and bought two. I finished off my trip with four round furniture feet and a can of Cabot water based stain in Ebony. I spent around $94.
This is the table finished,

This is how I put it together…. warning, my instructions are as clear as mud. This is what happens when you make up things as you go.
I started off by gluing down my 4 foot long boards to the sheet of plywood, putting the 2 inch boards on each end. The 2 inch boards overhand the plywood by about 1 inch. I didn’t have enough clamps so I stacked weights and old yearbooks on it to hold it all down…classy. Once dry, I flipped it over and built a little frame using the 2 four foot pieces and 2 two foot pieces. This was glued to the underside of the table top and clamped until set. Once set, I glued the four dowel rods which had all been cut down to 22 inches long to the table top, I nestled these snug against the frame corners. After set, I took the second sheet of plywood and placed it on top of the table legs, lining it up with the table top. Once set into place, I glued it to the four table legs and left to dry. Once dry, I built another frame from the 1×2 inch boards for the bottom part of the table. Once all the glue was dry, I flipped the table back over to the correct position and it stayed together, gorilla glue is no joke! Then I nailed the contraption together everywhere I thought I should secure it. I made sure the legs where nailed to both the bottom and top, and made sure the frames were also nailed in as well. I just kept going until I felt confident that it wouldn’t fall apart on me. Lastly, I flipped it back over and added the four table feet. You cannot see them, put it lifts the bottom shelf off the ground just enough. I also added a scrap furring strip across the bottom to reinforce the bottom shelf. After all that was said and done, I gave the entire piece 2 coats of stain.
In my living room, the table looks like this…
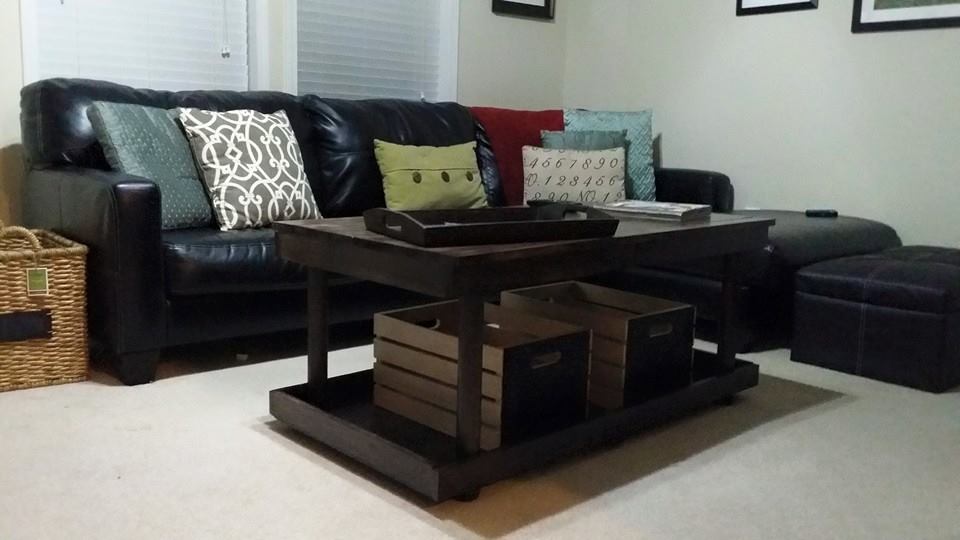
Perfect! I was still able to have ample toy storage space by adding the crates on the bottom. Those are just simple wood crates from Michael’s that I painted with a very light tan paint, and the end caps are painted with chalkboard paint so we can label the bins. Toys are still hidden, and I think it looks better in the space than the ottoman did. Plus, Sammie can easily remove a bin and play with those toys. I’m liking this furniture building hobby. 🙂